Service Master Cleaner

Service Master Cleaner

Thursday 23 June 2016

The Hazards of Hoarding

Please call 316.413.5742 to get a quote and schedule your appointment. While having your hoarder cleanup services, consider having other items cleaned while the techs are at your home.

People begin hoarding for a number of reasons. They believe they will need the items they keep; they think items will be valuable one day; they are emotionally attached to items, feel sentimental, or they have trouble seeing items in the trash.

Whether hoarding is connected to a medical condition or a condition all its own, it is an issue that divides the medical community.

Regardless of the motivations behind hoarding, it is unsafe and can make living conditions dangerous. ServiceMaster Cleaner’s professional staff is trained to help families compassionately and can safely return a home to habitable conditions.

The health consequences of hoarding


The majority of hoarding involves clothes, books, knick-knacks, mementos and various paper materials, like stationery or even coupons. There are serious health consequences if this clutter expands to unsafe levels and overtakes a home.

1. Dangers of fire
A home full of books and magazines is loaded with kindling. If paper covers a heat vent, fires may occur. Additionally, overcrowded outlets in a hoarder’s home can spark.

2. Impact on your lungs
Hoarding may lead to health problems, especially if people in an unclean environment breathe in damaging particles. Potential hazards to your respiratory system include mold spores, dust or chemicals.

3. Transmission of disease
When a setting becomes infested with mice, rats and/or biological material like fecal matter or urine, the situation is ripe for the spread of disease. If the home in question is full of animals, this danger may be magnified. It’s important to remember that contact with an infected surface can harm the homeowner or a visitor even if there is no visible threat, as some communicable diseases can survive outside the body for months.

4. Getting trapped or injured
When belongings are precariously stacked throughout a home, falling items sometimes injure hoarders. They may trip and hurt themselves and can even get trapped under debris.

5. Clutter obstructs first responders
In the event of an emergency, first responders may not be able to navigate a home to offer assistance if the clutter obstructs entrances or pathways to the bedroom.

ServiceMaster by Best returns homes to a safe environment


Cleaning a home occupied by a hoarder can be very dangerous. There are many serious hazards to avoid. That’s why it is important to call a professional when a home is in need of remediation.
Aftermath works with families and friends to remove waste and eliminate health risks. Our process helps prevent the spread of communicable diseases and offers the peace of mind that comes with knowing waste is disposed of properly. If you need assistance, give us a call. We’ll put the Aftermath Way to work for you.

Wednesday 15 June 2016

4 Remedies for Stubborn Odors


Please call 316.413.5742 to get a quote and schedule your appointment. While having your odor removal in Wichita, consider having other items cleaned while the techs are at your home.
There is nothing more pleasant than a clean, fresh-smelling home. Unfortunately, your home can also be a breeding ground for nasty odors. Here are some common home odors and how to get rid of them:

Stinky Garbage Can


Everybody is familiar with the stinky smell of a full garbage can. Eggshells, potato skins, and apple cores are all heaped together to create a disgusting symphony of smell. Thankfully, there’s an easy way to get rid of the odor: take out the trash.

But what if the garbage can still stinks?

You might be tempted to battle the stink by simply spraying the can down with an air freshener before putting a new bag in. But air fresheners merely mask the problem and are not effective in providing a real solution. Also, many contain harsh chemicals and the too-sweet smells might give you a headache. So it’s best to tackle the problem by getting to the odor source.

Firstly, you can also give the garbage can a good washing, either with dish detergent, bleach, or ammonia. But be careful! Mixing bleach and ammonia creates toxic fumes, which would be even worse than a smelly trash can. For the best results, clean and deodorize simultaneously with a commercial strength product like ODOREZE™ Natural Dumpster Odor Eliminating Spray & Cleaner.

Secondly, it best to prevent the smelly garbage problem in the future by adding a little bit of SMELLEZE® Natural Garbage Smell Proofing Granules in the bag before using it. This way the granules will continually absorb any rotting food smell as it’s created and keep your garbage can and kitchen smelling clean.

Smelly Diaper Pail


Parents only want what’s best for their children, especially when it comes to keeping the little ones safe and happy. A diaper pail is a breeding ground for nasty smells. Even those handy pails that wrap each individual diaper can only do so much. Be sure to empty the pail often.

If you’re worried about using harsh chemicals in the baby’s nursery, never fear. There are plenty of natural ways to get rid of the stinky diaper smell. You could try a dryer sheet in the bottom of the pail, or you can sprinkle in some baking soda. But the results may be marginal at best.

If neither of these is powerful enough to vanquish the diaper smell, then it’s time to consider using a professional but safe product like SMELLEZE® Eco Diaper Pail Odor Absorbing Crystals. This is a 100% natural product that eliminates stool and urine odor without using fragrances or toxic chemicals so it’s safe to use around the nursery.

Moldy Smells


Moldy smells can appear in any area of the house, but they’re most commonly found in the kitchen, bathroom, and basement – the damp areas.

  • In the kitchen: Be sure to wring out sponges and washcloths and let them dry thoroughly. If you live in a humid climate, switch out the sponge for a plastic brush. That way there’s no dark, damp place for mold to grow.
  • In the bathroom: Invest in a squeegee. After a steamy shower, squeegee the shower doors and any mirrors. In dry climates, floor mats will usually be okay, but be sure to wash them often anyway and even more often in humid areas.
  • In the basement: If water is getting in from the outside, get in touch with a professional waterproofing company. Even if you don’t hire them, they can give you some tips for keeping water away from the foundation of your home. You may invest in a sump pump, or have the rain gutters on your roof replaced to direct water away from the home.

Wherever the moldy odors are coming from, be sure to keep the area clean and dry. To help with the latter and prevent mold, place MOISTURESORB™ Reusable Moisture Absorbent Pouches in damp areas to capture excess moisture from the air. Mold spores can cause breathing difficulties and serious illnesses, so it’s important to track down and eliminate the cause of the smell.

Toilet Smells


The stench of a backed-up drain is one of the most unpleasant odors in a home. But if you’ve got a smelly toilet, don’t panic. As long as you’ve got another working commode in the house, you can use that one while you deal with the problem. Here are a few tips for getting rid of the yucky toilet smell:

  • If the toilet is clogged, try to force the clog through by using a plunger. If that doesn’t work, you can use hot water with a bit of dish soap – hot water will hopefully loosen the clog. Another method to try is baking soda and vinegar. That volcanic action will, with any luck, force the clog out of the pipes.
  • If, after all your hard work, the toilet is still clogged, it’s time to call in the professionals. Plumbers in Oakville are sometimes available 24/7, so you can get help whenever disaster strikes.
  • If the toilet isn’t clogged, you’re in luck – it just needs a good cleaning. Instead of simply scrubbing the bowl, get a rag and some cleaner and wipe down the entire outside: tank, lid, seat, bowl, base, and the floor around. Inside the bowl, use whichever toilet cleaner you like best. For tough stains, drop in a denture cleaning tablet or two. Let them effervesce for half an hour or so, give the bowl a quick scrub with the brush, and flush. For tough commode odors, discretely hang a SMELLEZE® Reusable Toilet Odor Eater Pouch on the side of the tank in the commode.

No matter where the stubborn odor is coming from, getting rid of it is easier than you think once you know how.

Thursday 9 June 2016

8 No-Sweat Tricks to Clean Any Type of Floor


The same quality that makes this natural material so beautiful—its porosity—makes it very susceptible to water damage. Because it’s so absorbent, most cork flooring is sealed, but you still need to proceed with caution.


Please call 316.413.5742 to get a quote and schedule your appointment. While having your hardwood flooring cleaned in Wichita, consider having other items cleaned while the techs are at your home.

Don’t break out the knee pads and scrub brushes just yet. Whether your floor is laminate or tile, linoleum or cork, we’ve got the simplest and safest ways to keep them looking spotless and new.

1. Cleaning Laminate Flooring

laminate-flooring

After all, the planks are constructed in sun- and light-resistant layers to maintain a like-new appearance for years. That said, it’s important to keep water from getting underneath the planks. Dearing recommends dry mopping or vacuuming the floor, making sure the machine is on tile mode (as opposed to carpet) so the beater bar is raised. Spot-clean with a slightly damp mop (or a wet Swiffer, since they aren’t sopping wet) when necessary.

Dearing’s last bit of advice: Never polish a laminate floor. If the finish of a plank looks damaged, it’s best to replace it.

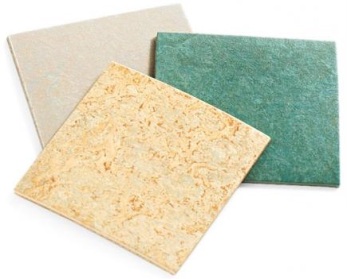
2. Cleaning a Cork Floor

cork-flooring

“Vacuum often to prevent scratching, wipe up spills immediately, and wash cork floors once a week,” says Leslie Reichert, the Green Cleaning Coach. Reichert suggests skipping commercial cleaning products in favor of a vinegar-and-soapy-water solution: Place 1/4 cup vinegar in a spray bottle with 1 drop of dish soap and warm water.

Naturally acidic vinegar works with the soap to break down dirt, cut through build-up and disinfect. Don’t shake the solution (that would create suds), just gently combine the ingredients in a spray bottle by rocking it back and forth. Spray the floor a section at a time and wipe with a damp microfiber mop as you go.

3. Cleaning a Hardwood Floor

hardwood-squares

Hardwood floors typically have one of two finishes: polyurethane or wax. Not sure what you’re standing on? Rub your finger across the surface, says Meg Roberts, president of Molly Maid. If a smudge appears, the floor is likely waxed.

Sealed wood floors typically have a urethane, polyurethane, or polyacrylic coating. This protects them from stains and water damage, says Roberts. To clean, simply mix ¼ cup of mild or pH-neutral soap (try Seventh Generation All-Purpose Natural Cleaner Concentrate) with water in a bucket. (Steer clear of acidic vinegar solutions, which can dull wood floors over time.) Then damp-mop (be sure the mop is wrung out very well), using a dry microfiber cloth to wipe up any excess moisture. Clean high-traffic areas like the kitchen once a week; for less-trafficked areas, mop once a month.
If you have waxed wood floors, you’re off the hook—sort of. Since this type of flooring can be damaged by even small amounts of water, keep damp mops away from this surface, and instead sweep, dust mop or vacuum regularly.

4. Cleaning Bamboo Flooring

bamboo-flooring

Bamboo is sustainable, beautiful—and in some cases, softer and more prone to nicks and scratches than hardwood floors. Unless you have strand bamboo flooring—the hardest, most durable type available—be extra vigilant about regularly sweeping up dirt and debris. “Especially with the expense of bamboo, extra care should be used,” says Roberts, who uses a tennis ball to gently buff out marks. She uses the same cleaning solution on bamboo as on hardwood: mix ¼ cup of mild or pH-neutral soap in one bucket of water. Swipe across floor using a barely-damp mop, wiping up excess moisture with a dry microfiber cloth.

5. Cleaning a Linoleum Floor

linoleum-flooring

We’re not talking nearly-indestructible vinyl flooring (see the next section for tips on cleaning that surface). True linoleum is made from linseed oil, resin, limestone, wood fiber and cork dust, and colored with mineral pigments. Treat this resilient, natural flooring as you would cork, advises Reichert: Mix up a spray bottle of just a few drops of dish soap and hot water, then spritz a section of the floor at a time and wipe with a damp microfiber mop. The floor should air-dry almost immediately, but if it feels slightly sticky to the touch just swipe it with another clean, damp microfiber mop or cloth.

6. Cleaning a Vinyl Floor
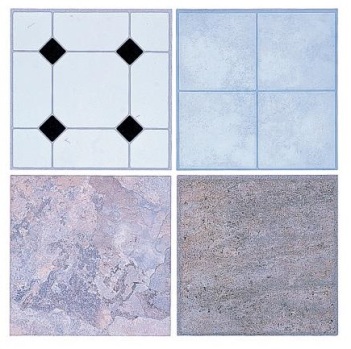
vinyl-flooring

For weekly cleaning, use Reichert’s spritz-and-dry mop technique to keep tile floors looking fresh: Gently mix 1/4 cup vinegar in a 16-ounce spray bottle with 1 drop of dish soap and warm water. Spray the floor one section at a time and wipe with a damp microfiber mop as you go. For periodic deep cleans, she likes to use a steam cleaner to clean both tile and grout—the steam does the work of removing stains (and bacteria!), so you don’t feel like you got an extra workout right there in your kitchen.

7. Cleaning Natural Stone Flooring

natural-stone-flooring

Whatever you do, leave the vinegar in the pantry, warns Kris Koenig, CEO of eco-friendly cleaning company Natura Clean, in Middleton, Wiss. Even a small amount of the acidic liquid could damage stone floors, as could bleach and ammonia. Instead, mop sealed stone floors with a pH-neutral, non-chelating cleaner that won’t react adversely to the minerals in natural surfaces. Koenig’s favorite is Naturally It’s Clean Floors cleaner.

If your stone tiles are unsealed, says Reichert, simply mop with a microfiber mop and hot water; chemicals would penetrate the stone. For stubborn dirt, use a steam cleaner.

8. Cleaning Porcelain Tile Flooring

porcelain-tile-flooring

For weekly cleaning, use Reichert’s spritz-and-dry mop technique to keep tile floors looking fresh: Gently mix 1/4 cup vinegar in a 16-ounce spray bottle with 1 drop of dish soap and warm water. Spray the floor one section at a time and wipe with a damp microfiber mop as you go. For periodic deep cleans, she likes to use a steam cleaner to clean both tile and grout—the steam does the work of removing stains (and bacteria!), so you don’t feel like you’re getting an extra workout right there in your kitchen.

Wednesday 1 June 2016

Indoor Mold Removal: the Health Risks, Identification and Remediation

Indoor Mold Removal in Wichita Ks (316) 413-5750
 
When you think of indoor mold, what typically comes to mind? That neglected drawer in the fridge—you know the one, where you stash the broccoli your kids despise? Truth is, indoor molds are common and come in many varieties, yet are often overlooked. As the source of health problems including allergies, asthma attacks and worse, mold removal performed by a professional may become necessary.
 
What sorts of health problems are caused by indoor mold?
 
When mold cells are breathed in and invade the respiratory tract, the body’s immune system tries to destroy the mold much like it would fight a flu virus. The result could be a runny nose, headaches, scratchy throat and sneezing, or allergic rhinitis.The lung disease asthma, in which the airways that carry oxygen to the lungs can partially close, can also be aggravated by indoor mold. More than half of asthmatics have respiratory allergies, and inhaling mold can trigger asthma episodes in sensitive cases.

Respiratory infection, in which live mold occupies the tissues of the respiratory tract or lungs, is especially dangerous for those with weakened immune systems.

Finally, ingesting or inhaling large doses of certain molds can result in poisoning caused by toxins in the mold cells.

What are the most common indoor molds?


Generally speaking, there are three categories of mold: allergenic, known to cause allergic reactions; pathogenic, of concern to those with weak immune systems; and toxigenic—a danger to all. Folks sometimes try to categorize mold by its color, but this doesn’t always work, as both harmless and harmful molds exist in each color group.

Two recognizable molds that pose health problems are:

  1. Green Molds (Aspergillus/Penicillium) – With over 185 types, this fungus is linked to allergies as well as a serious infection called Aspergillosis found in the lungs, ears, eyes, nose, sinuses, and even the brain. Aspergillosis is caused by inhaling the spores of green mold. And green mold, like all molds, is the result of exposure to moisture.
  2. Black Molds (Stachybotrys) – Perhaps the most dreaded of molds, black mold is slimy to the touch and grows rapidly in wet wallpaper, drywall, carpet, ceiling tiles and elsewhere. Not all black mold is toxic. Professional testing using protective clothing and equipment is needed to be sure. Black mold removal should be done by professional remediation if results are positive.

What does the mold removal process involve?


According to the EPA, “the key to mold control is moisture control.” Mold spores won’t grow if moisture isn’t present, so if there is a moisture problem in your home or office, you must clean up the mold and fix the water issue or the mold will return.

Mold remediation is the process of cleanup and removal of mold from an indoor environment. Step one is a visual examination to determine if mold is present, what species it is and what level of remediation will be necessary. The assessment often involves moving furniture, lifting or removing carpets, checking behind wallpaper and even opening up walls…much to the property owner’s dismay.

In some cases, especially when occupants of the home or business are experiencing symptoms of illness, sampling of the mold spores may be performed by experts to answer further questions.

When cleaning the mold with bleach, it is important to wear a respirator and protective clothing. Better yet, play it safe and leave the job to the experts who may use any number of high-tech mold removal methods and equipment in the remediation process, including:

  • Moisture meter
  • Humidity gauge
  • HEPA filtered vacuum
  • Dry ice blasting
  • Borescope (to view potential mold problems inside walls without damaging them)
  • Themographic camera
…and more.

To learn more about mold remediation, talk to your local disaster cleaning and restoration professionals. If you suspect that mold is affecting the health of those in your home or office space, please don’t wait—mold problems should be addressed within 24 to 48 hours.

ServiceMaster by Best Cleaning & Restoration has proudly served all of Wichita Kansas. ServiceMaster by Best specializes in the complete repair of fire, smoke, wind, water and vandalism damage to both commercial and residential properties. Capable of handling any size loss and working with all types of insurance providers, the ServiceMaster by Best disaster team is available 24 hours a day, 365 days per year.

For more information, visit www.smbybest.com or call 316-413-5738